

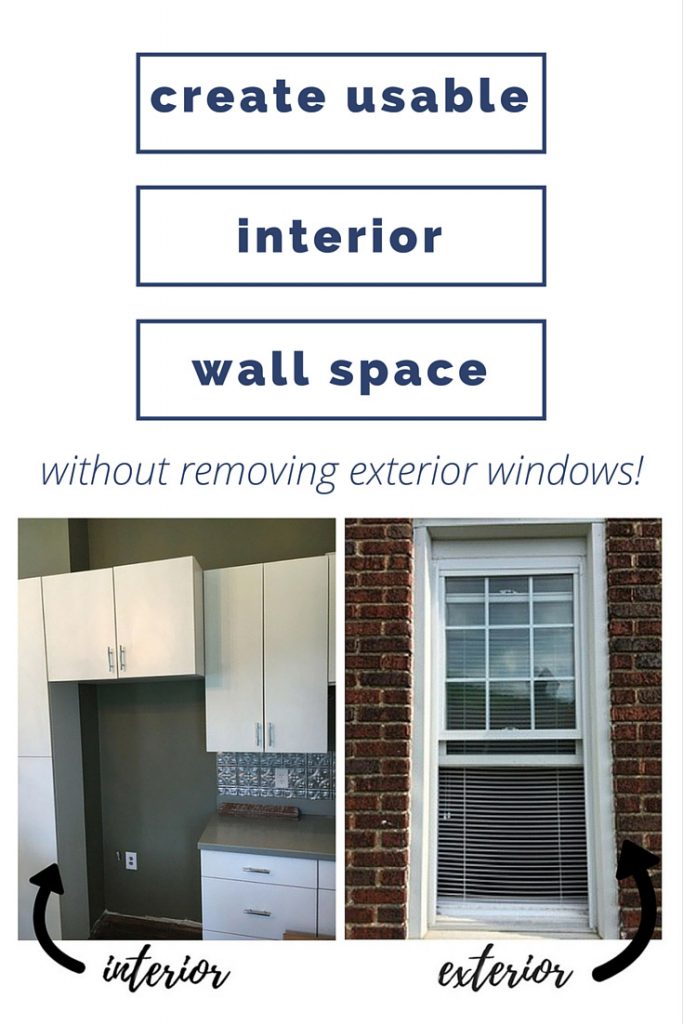
How To Cover Up A Window From The Outside
You guys! Since I've been soooo busy with the move and getting our house on the marketplace, my expert friend Melony fromSledgehammer Queenoffered to write a invitee postal service on a fabulous pull a fast one on she used in i of her recent flips! You are gonna LOVE this remodeling hack. And exist sure to bank check out her blog for more details on her crawly business firm renovations.
Hi, I'g Melony from SledgehammerQueen! I desire to thank Christy for allowing me to guest post on The Harper Firm! I dear reading about the flips that she and her husband do. I'm currently on the prowl for shiplap then I can recreate some of the projects Christy does!!
My hubby and I also flip houses in the little town of Hooversville, PA. Our boondocks was a mining town, and like lots of fiddling communities beyond America, the world has moved on to bigger and better. People tend to expect down on communities such as this, merely I've lived here for 34 years and I accept to say, it's a corking place to live.
We have the dazzler of the Allegheny Mountains all around usa, and for a customs of 700, we have a hardware store, two grocery/sundry stores, a post function, a bank and an eating establishment!! Our goal is to encourage others in surrounding communities to see the beauty in this town and to want to live in such a wonderful customs.
Today, I desire to share with you lot our solution to i of those nagging problems- how to eliminate a window in a brick house and get in look great on the exterior of the home; so here's our accept on this dilemma:
When renovating houses, sometimes information technology becomes necessary to eliminate windows to reconfigure the layout of rooms. I notice this almost oftentimes happens with kitchens. My hubby and I tend to piece of work on old houses, so often, in the kitchen, in that location are doors to the basement, doors to the the dining room, doors to the hall and maybe fifty-fifty the back door! Then at that place are 5 foot tall windows and former fashioned hot water radiators to work around. This leaves near three feet of usable wall space to hang cabinets on (I exaggerate a bit, but not much).
We as well tend to knock downwardly a lot of walls to create open flooring plans, but then yous accept fifty-fifty less wall space to work with to configure the cabinet arrangement. The good news is, since the walls are downwardly, now the calorie-free from other rooms' windows tend to light up the kitchen, and then yous can eliminate a window and there is still plenty of sunlight streaming in.
Now, here'due south the dilemma- what do you do when the firm is brick? I'm okay with taking windows out when I know I will exist re-siding and no i will e'er know a window used to exist in that location. What are your options with brick? Put a piece of wood in the opening and pigment it to match the brick? I have always felt that it wasn't an pick to remove a window in brick because I simply don't like this wait. Then, inspiration struck!
In our Water Street Firm in that location just wasn't a logical place to put the kitchen cabinets unless nosotros removed this window.
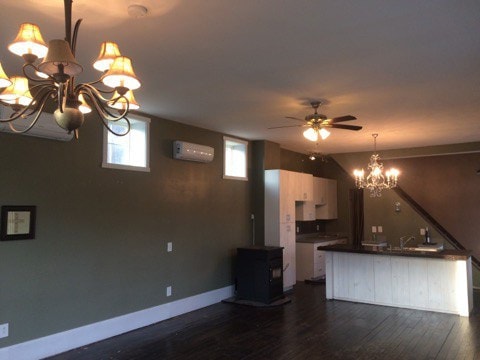
Now, we really eliminated this window a couple of years ago. It was located in the corner of the room beside where the tall white cabinet at present resides.
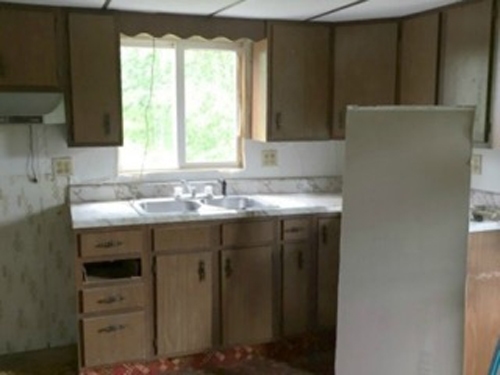
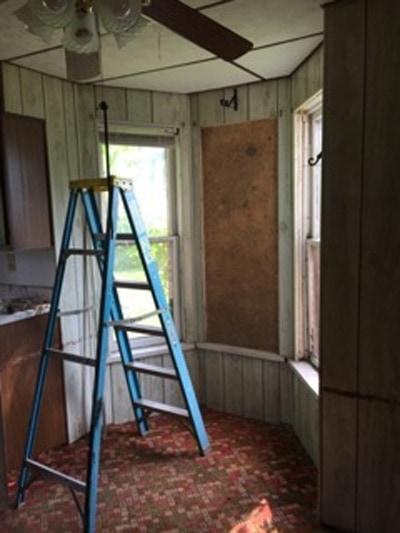
Since we can't go back and show you exactly how nosotros did this, my crawly hubby, Neb helped me do a mock-up of the procedure. We did the mock-up in an onetime firm (the Riverhouse) that nosotros haven't renovated yet, and so hold on to your hats, the post-obit pictures are a trivial scary!! Here'south an overview of the kitchen (beautiful isn't it?).
Here is the window we "eliminated" in our demo.
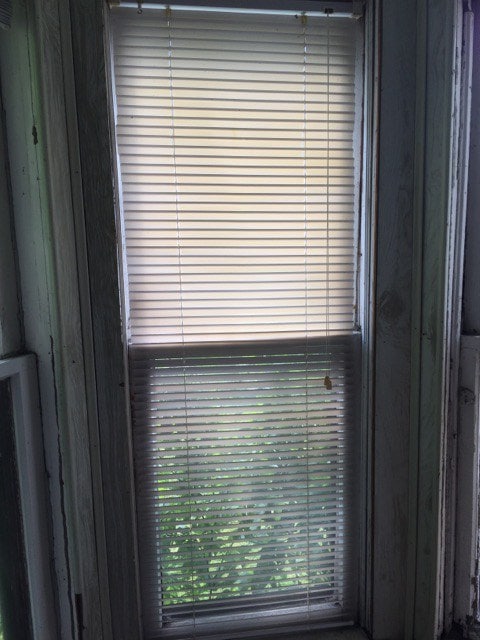
I chose this window to practice this demo on considering information technology was one of the only ones in Riverhouse that still had a mini blind in it. The mini bullheaded is an important office of this procedure, then fifty-fifty though information technology'due south dirty and gross, at least I didn't take to purchase one 🙂
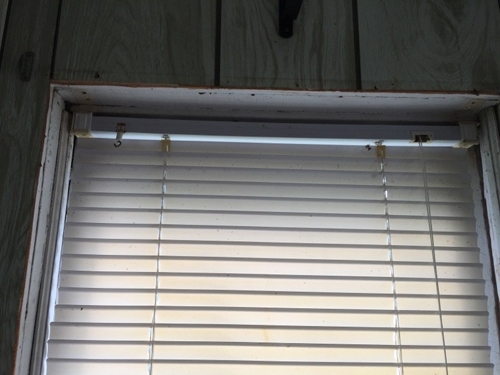
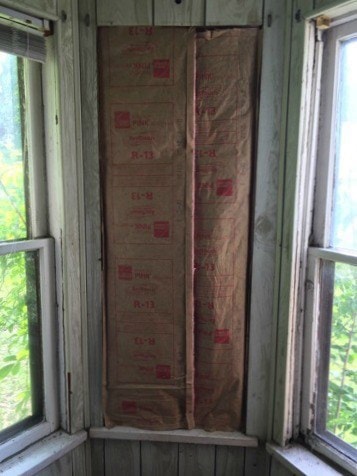
Nosotros re-installed the mini blind brackets to the surface of the window so that we would take the maximum amount of room left after the next step, which is to install particleboard over the mini blind. When we did this technique at Water Street, we painted the outside of the particleboard black (You will encounter this down below). For this demo, we just installed the particleboard unpainted.
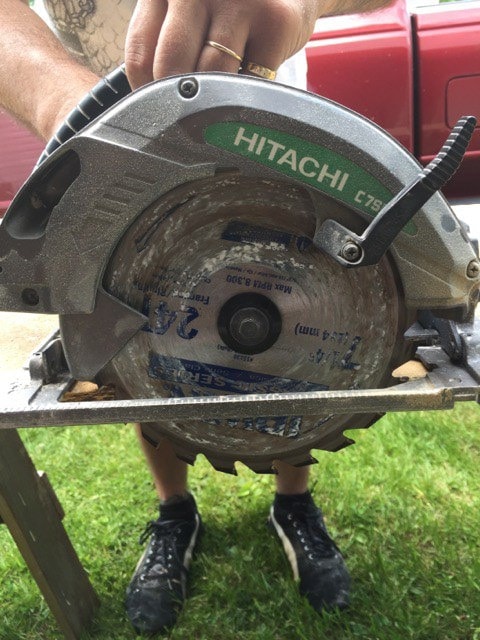
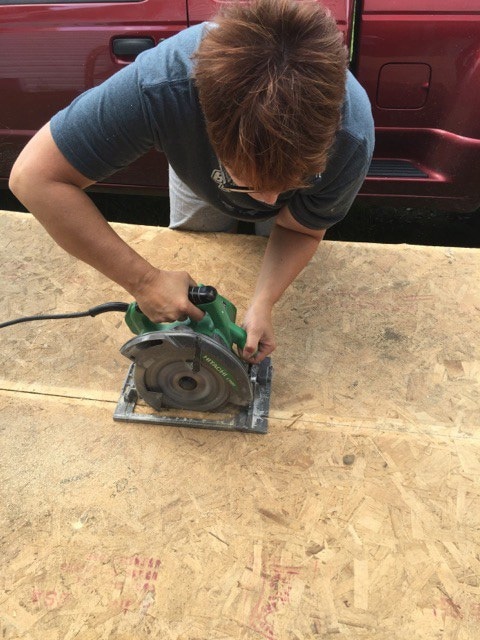
For those of you not super familiar with circular saws, we thought nosotros'd also bear witness you how to adjust the circular saw for the right depth to cut through the plywood. In the to a higher place photo, you tin come across how far the blade is below the guide. This would be the proper depth to cutting a thicker piece of wood.

Adjusting the blade is accomplished past releasing the lever at the back of the saw, and so moving the blade upwards or down depending on what you lot are doing. We wanted to cutting through the plywood without cut through the sawbucks, so yous tin can encounter, the depth of the saw needs to be very shallow as our particle board is only 7/16″ thick.
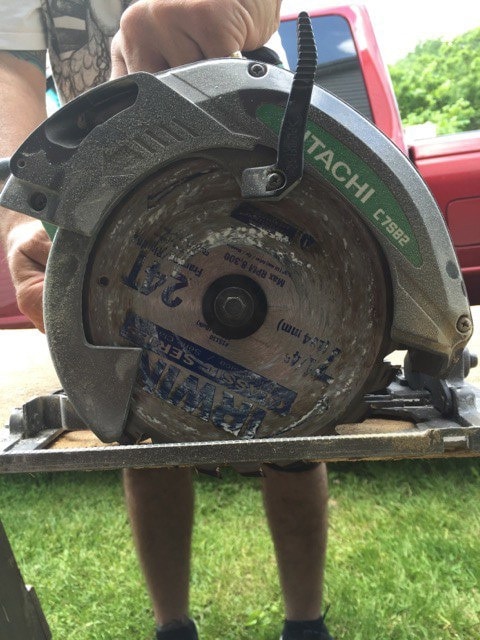
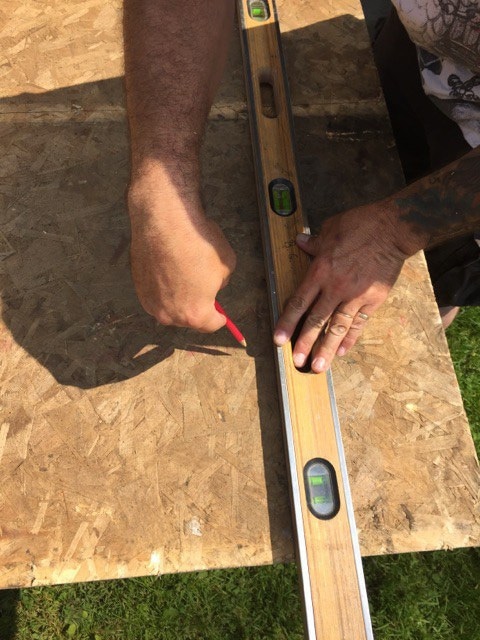
After we got the right depth (above), we then measured the opening of the window and then marked and cut the particleboard to fit. Disclosure – the window opening was Really kleptomaniacal, so it took us 4 adjustments to get the particleboard to fit. Hopefully your house is much straighter than this old beauty.

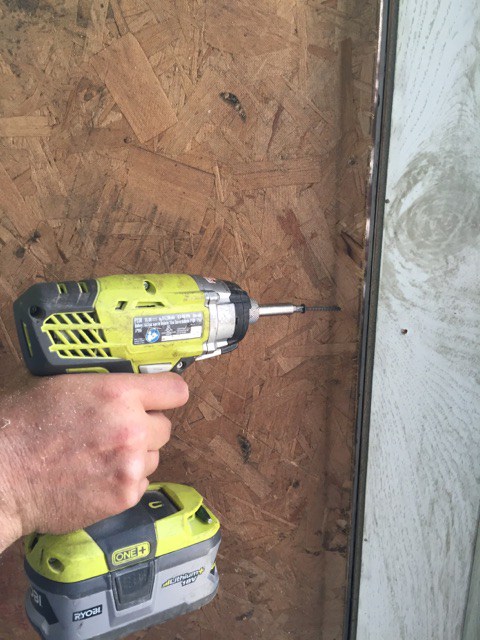
We so attached the particleboard to the stops at the side of the window with screws. At Water Street, Bill likewise caulked around the border of the particleboard to go along dust and bugs out of the house.
Here'southward an overview of the window covered with the particleboard. Please ignore the white paneling! (Hello 1970's). This house has this corking bump-out on both sides of the house. Patently, I would never embrace up a window in such a cool characteristic, but again I picked this window because it had the bullheaded 😐
Nosotros then installed insulation over the particleboard. At the Water Street house, the walls are xv″ thick so it was really easy to install a nice thick layer of insulation. At this house (and at nigh houses) the walls are a standard thickness, so I removed one-half of the thickness of the insulation and and so installed information technology.
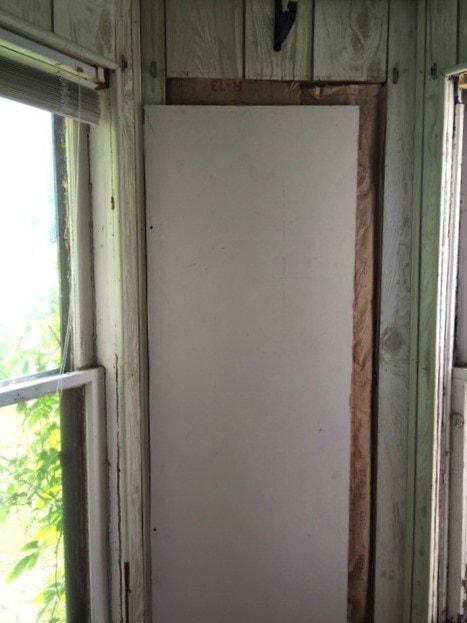
Here is a close-up of the drywall and so installed over the installation. We used a spare slice of drywall to but give you an idea of how the window opening would disappear and you would accept a new blank surface to piece of work on. You can encounter a glimpse of the insulation (and of course the particleboard) under the edge of the drywall.
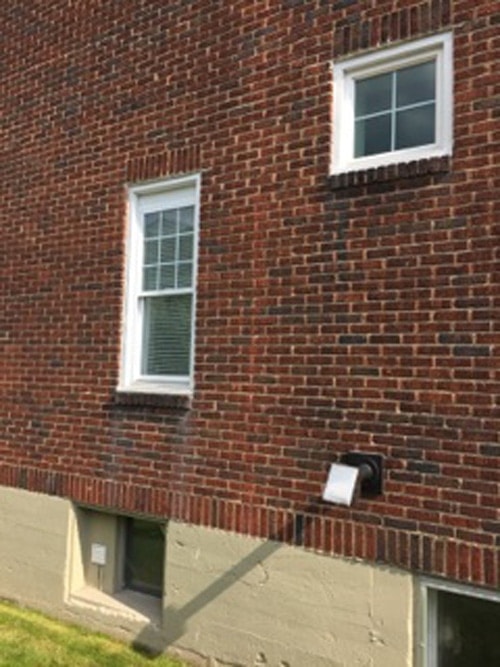
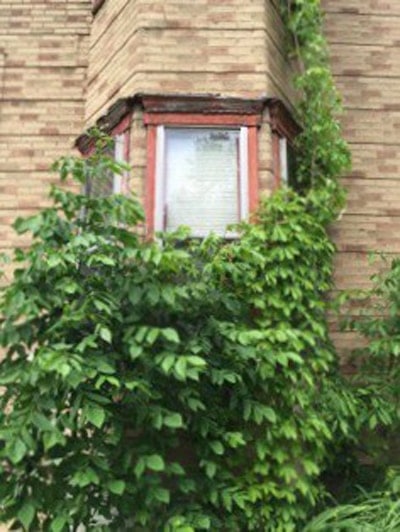
Here's what this window looks like from outside now. It looks like you have the blinds closed, but read on because at the Water Street house, information technology looks fifty-fifty more than realistic.

At the H2o Street belongings, first we installed a brand new window and so it would match the other windows we replaced, and deliberately left it unlocked. We and then installed a brand new mini blind. Leaving the window unlocked allows for future maintenance, such every bit keeping the within of the window opening clean or replacing the mini blind.
I'm certain we will accept to be contortionists to address these issues, but worst case scenario, we can simply remove the window panes, fix what needs fixing and then reinstall them. I know eventually the mini blind will suffer from dry out rot, but the skilful news in this case is that the window doesn't get much directly sunlight considering information technology is shaded by the garage next door. So, if y'all're reading between the lines, this window had the worst view of whatever in the house. The other windows have nice views of the yard and the Stonycreek River which runs forth the back yard, so it would have been a much harder determination to determine to remove 1 of those windows.
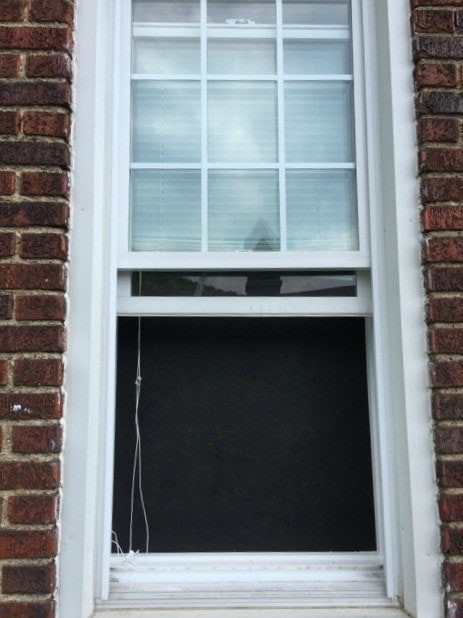
To finish the kitchen walls, on the within we cut a canvas of particleboard to fit the opening and painted it black on 1 side. From the outside, doesn't it just wait similar the window is open? You are looking right at the particleboard.
Just similar in the mock-upward, nosotros then insulated the opening that was left on the interior side. Over all of this, nosotros drywalled, painted and finished the kitchen.
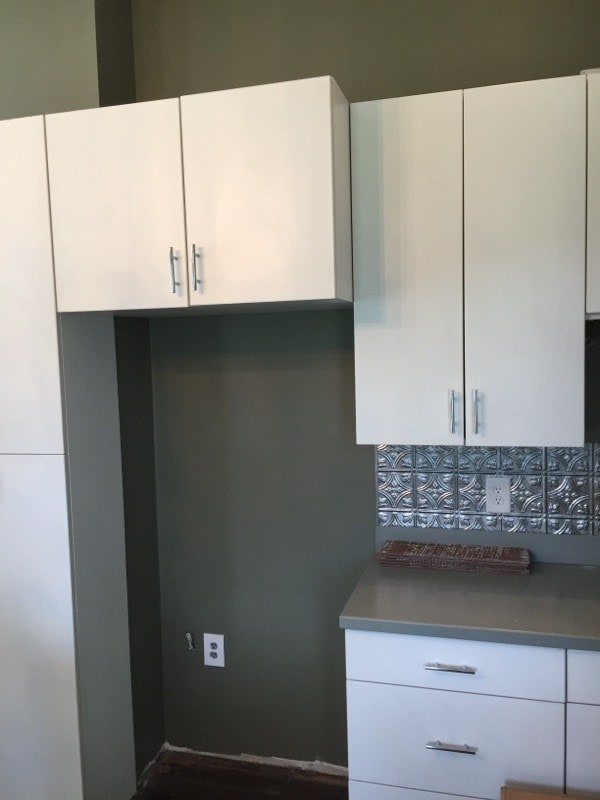
Correct where the refrigerator volition go, the window is still there, y'all just tin can't see it!
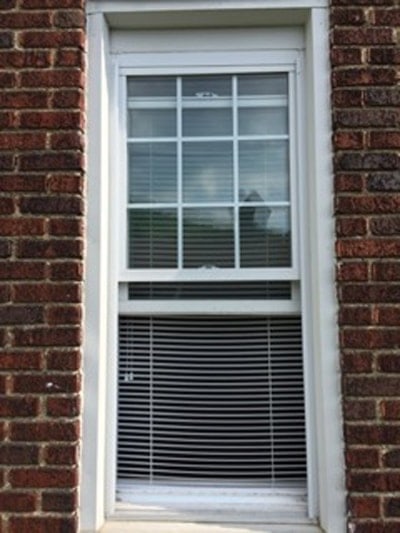
On the outside we have what looks similar a perfectly normal window, with the blinds open (and no lights turned on). On the inside we have a complete kitchen with room for a refrigerator. Do you lot have a situation like this at your house? Volition this help you to solve the problem? Let me know!
If yous would like my Free Printable on "How to Purchase a House, and not a Lemon", you lot tin can notice it here. I promise you enjoyed this mail service and once more I would like to thank Christy from the bottom of my heart for allowing me to share this post with you, her awesome readers!
Cheers!
Melony @ sledgehammerqueen.com
pin this for later!

How To Cover Up A Window From The Outside,
Source: https://www.theharperhouse.com/remodeling-hack/
Posted by: garzareque1949.blogspot.com
0 Response to "How To Cover Up A Window From The Outside"
Post a Comment